Most people buy a water filter backwards. They pick a popular brand, bring it home, and only later wonder whether it actually removes the thing they were worried about. The result is a cabinet full of filters that polish the taste of water that was already safe, or worse, a filter that does nothing for the one contaminant that mattered.
The right order is the opposite. You start with your water, figure out what is actually in it, and only then choose a filter built and certified to remove those specific contaminants. Everything else, format, price, brand, follows from that. This guide walks through that process step by step, so that whatever you end up buying, you can say exactly why.
Step One: Find Out What Is Actually in Your Water
You cannot filter a problem you have not identified. Before looking at a single product, find out what your water contains.
If you are on a municipal supply, your utility is required to publish an annual water quality report, often called a Consumer Confidence Report. It lists the contaminants detected in the system and how they compare to federal limits. It is free, it arrives every year, and most utilities post it online. Read it. It will not capture what happens between the treatment plant and your tap, but it tells you the baseline.
That gap between the plant and your glass is exactly why a home test is worth it, especially in older buildings. Municipal water can leave the plant within federal limits and still pick up lead from aging service lines and interior plumbing on the way to you. A mail-in lab test gives you a contaminant profile specific to the water coming out of your own faucet, which is the only number that truly matters.
If you are on a private well, none of the municipal protections apply to you. No utility is testing your water, and no report is coming. Well owners should test at least annually for bacteria, nitrates, and the contaminants common to their region, and more often if anything about the taste, smell, or color changes. Wells also raise the possibility of microbial contamination, which changes the kind of filtration you need.
Step Two: Know Which Contaminants You Are Targeting
Once you have your water profile, the contaminants tend to fall into a few familiar groups, and each calls for a different filtration approach.
Chlorine and chloramine are added on purpose to keep water safe through the distribution system. They are not dangerous at tap levels, but they are the usual culprits behind a chemical taste or smell. Activated carbon handles them easily, which is why nearly every filter improves taste.
Lead is the contaminant most worth taking seriously, because it is invisible, has no safe level, and usually enters water from old plumbing rather than the source. It demands a filter specifically certified for lead reduction, not just any carbon filter.
PFAS, the so-called forever chemicals, have become a defining concern, and the regulatory picture is in flux. In May 2026 the EPA proposed keeping the enforceable limits for PFOA and PFOS at 4 parts per trillion while letting water systems push their compliance deadline from 2029 out to 2031, and separately proposed rescinding the limits for four other PFAS compounds including GenX, PFHxS, PFNA, and their hazard index mixture. Those proposals are still in a public comment period and are not final. The practical takeaway for a buyer is simple: federal protection at the tap is being scaled back and delayed, so if PFAS concerns you, a point of use filter puts the protection in your own hands now rather than years from now.
Fluoride, arsenic, nitrates, and other dissolved contaminants are difficult cases. Most carbon filters do not meaningfully reduce them. Removing them reliably takes reverse osmosis or a media specifically designed for the job.
Microbes such as bacteria, viruses, and cysts are mainly a concern for well water and emergency situations. City water is already disinfected, so unless you have a specific reason to worry, microbial filtration is usually unnecessary on a municipal supply.
Sediment and total dissolved solids round out the list. Sediment is the visible grit and rust that a basic filter catches; total dissolved solids are the mineral content that affects taste and that reverse osmosis is built to strip out.
Step Three: Understand What Each Filter Type Can Do
Filters come in a handful of formats, and the choice is mostly about how much you want to filter, how much you want to spend, and what your home or lease allows.
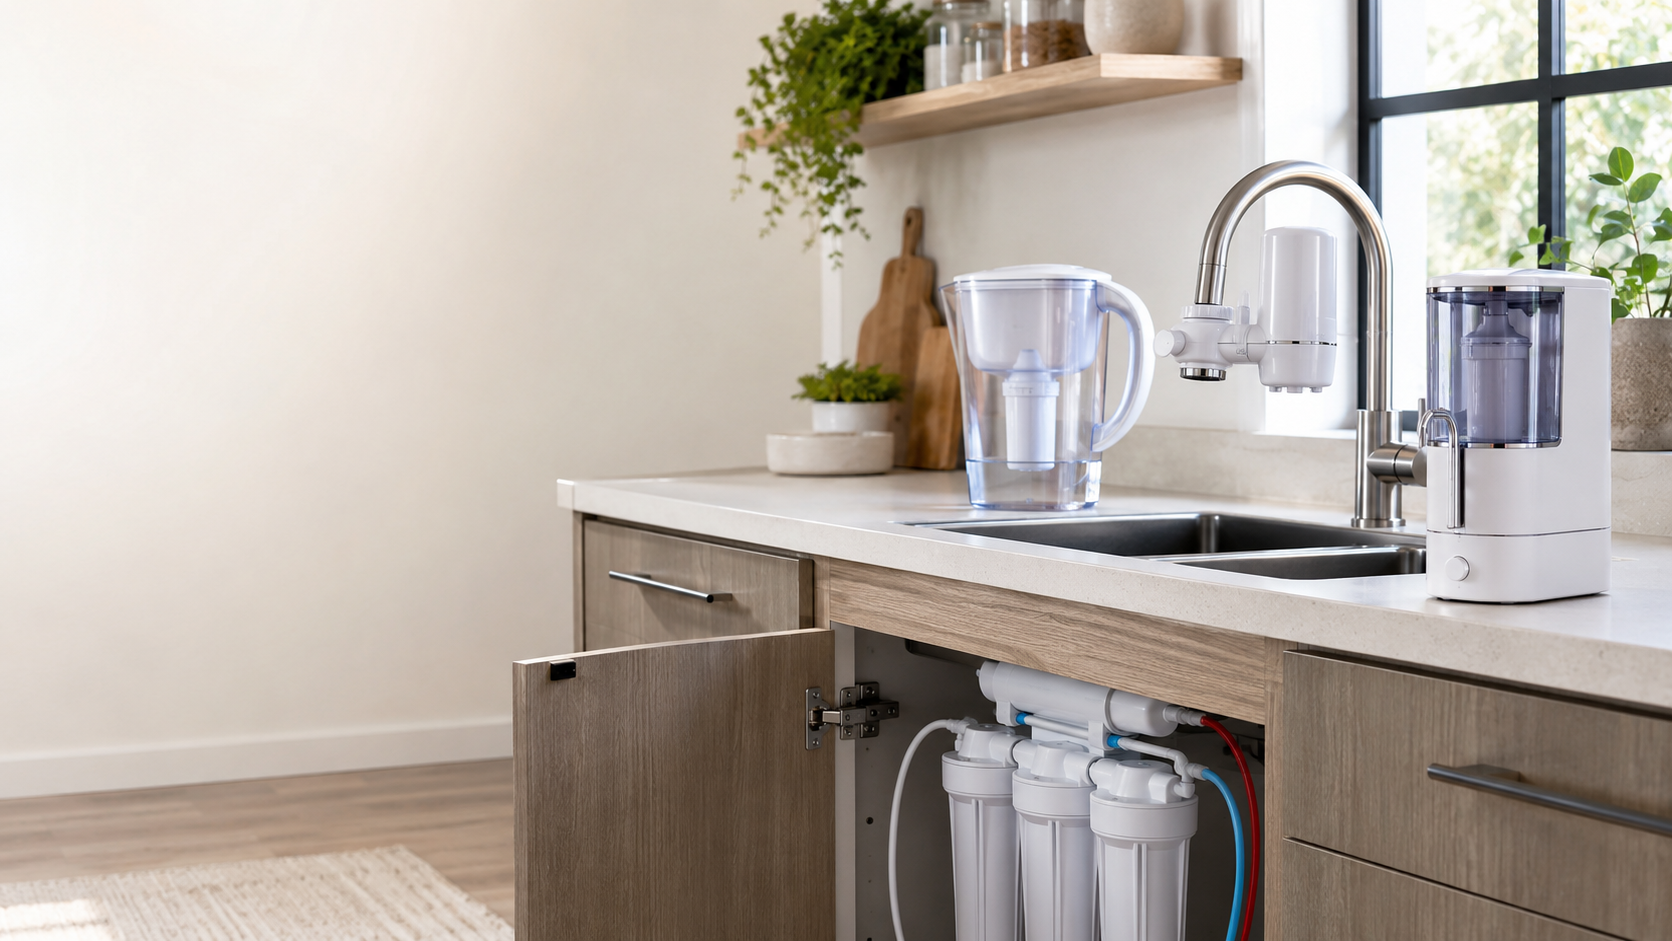
Pitcher and dispenser filters are the easiest entry point. They need no installation, fit in the fridge, and the better ones now carry real health certifications. The trade is throughput, since they make water in small batches, and ongoing cartridge cost.
Faucet mount filters screw onto the tap and deliver filtered water on demand with a toggle for switching between filtered and unfiltered. They are cheap and quick, but they reduce flow, and they do not fit the pull down sprayers common on newer faucets.
Countertop systems, including countertop reverse osmosis, sit on the counter and run as appliances with no plumbing. Countertop RO in particular now delivers the kind of purity that once required an under sink install, which makes it a strong choice for renters and anyone avoiding plumbing work.
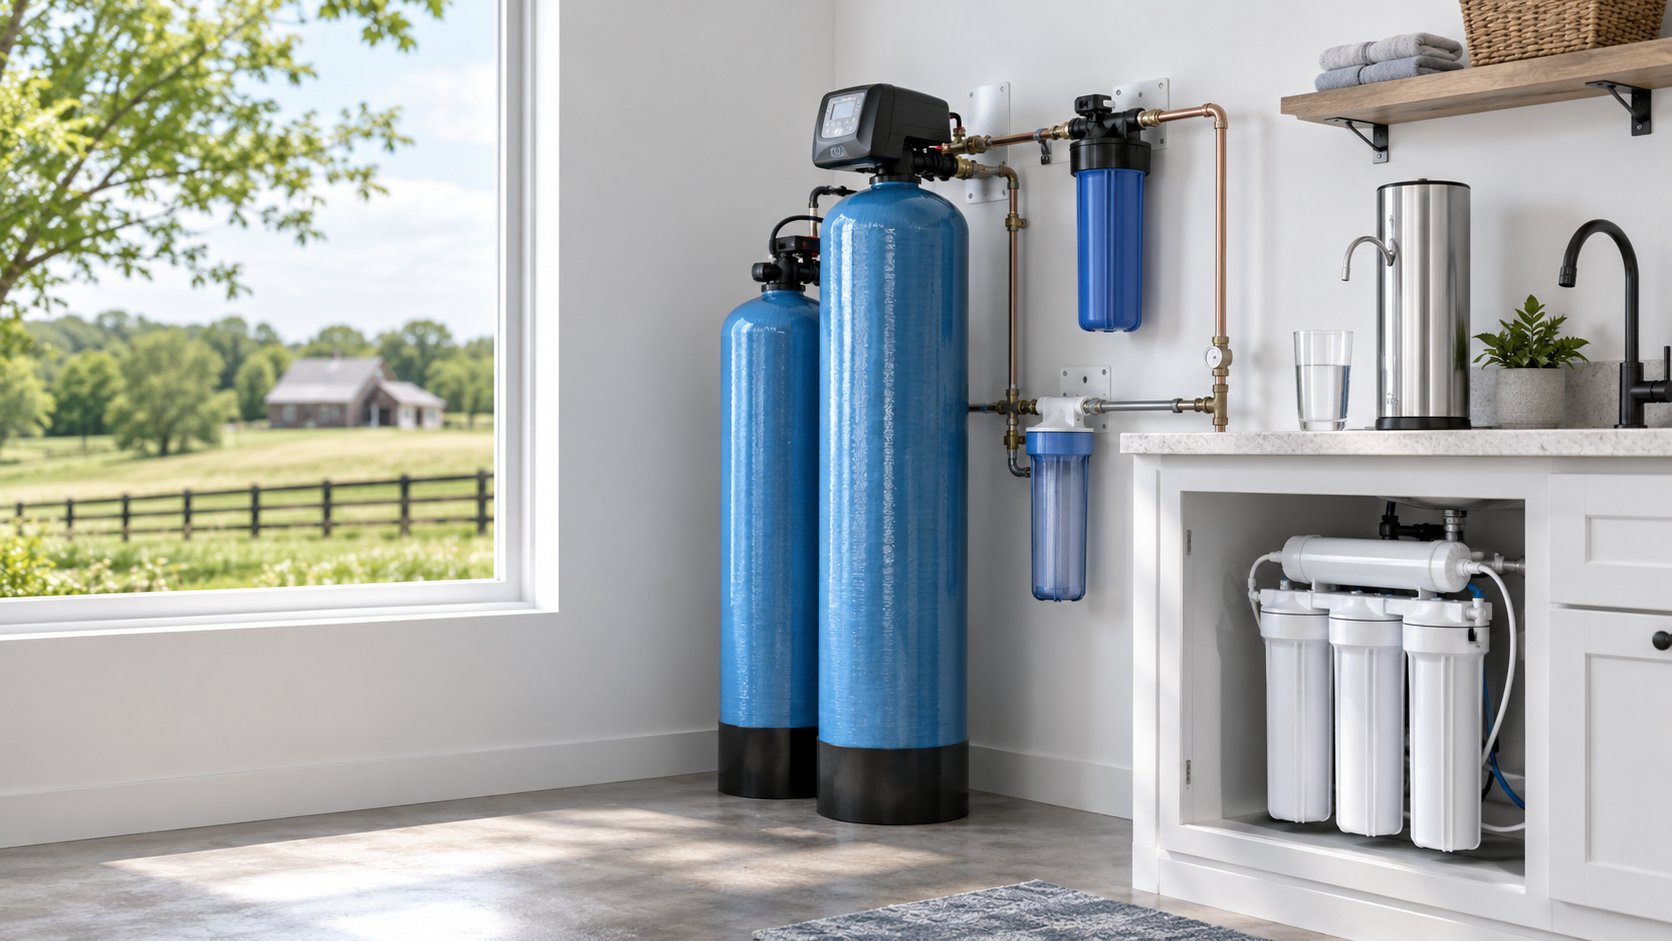
Under sink systems connect to your cold water line and tuck out of sight, offering high capacity and strong filtration. They require installation and, for full reverse osmosis, usually a dedicated faucet, which means a hole in the counter. They are a homeowner’s option more than a renter’s.
Whole house systems treat water as it enters the home, protecting every tap, shower, and appliance. They are the most thorough and the most expensive, and they make the most sense for well water, sediment problems, or hard water affecting the whole house rather than a single drinking contaminant.
Gravity filters use no power and no plumbing, pulling water through ceramic or carbon elements by gravity alone. They appeal to off grid and emergency use, but they tend to be bulky and slow, and their certification picture is less consistent than reverse osmosis and certified pitchers.
Step Four: Read the Certifications Correctly
This is the step that separates a confident buyer from a confused one, because the marketing on a filter box rarely matches what the certification actually proves.
A certification from NSF, or from the other bodies that test to the same standards such as WQA and IAPMO, means an independent lab verified a specific claim. But the claims are narrow. Certification is granted contaminant by contaminant and model by model, so “NSF certified” on its own tells you almost nothing. A filter can be NSF certified for chlorine and have no certified ability to reduce lead at all. Always look at which standard, and which specific contaminants within it, the model is certified for.
The standards themselves sort out cleanly once you know them. NSF/ANSI 42 covers aesthetic effects, mainly chlorine taste and odor; it is about comfort, not health. NSF/ANSI 53 covers health effects and is the one that matters for lead, certain VOCs, cysts, and other contaminants with real health risk. NSF/ANSI 58 is the reverse osmosis standard, covering the broad dissolved solids removal that only RO achieves, including contaminants like fluoride and arsenic. NSF/ANSI 401 covers emerging contaminants such as pharmaceuticals and pesticides.
For PFAS specifically, the older standalone P473 protocol has been folded into Standards 53 and 58, so a current filter proving PFOA and PFOS reduction will typically show it under an updated NSF/ANSI 53 or 58 listing. A couple of supporting standards are worth recognizing too: NSF/ANSI 372 certifies lead free materials in the filter itself, and NSF/ANSI 61 confirms the filter’s own components do not leach contaminants into your water.
The single most useful habit here is to match the standard to your contaminant. If lead is your concern, you want NSF/ANSI 53 certified for lead, not a filter that is merely NSF 42 certified for taste. The label “certified” is only as meaningful as the specific claim behind it.
Step Five: Budget for the Real Cost, Not the Sticker Price
The price on the box is the smallest part of what a filter costs you. The number that matters is the total over a few years, and the biggest variable is cartridge replacement.
A cheap pitcher with frequently replaced filters can quietly cost more over five years than a pricier system with long lived cartridges. Reverse osmosis membranes last a couple of years but prefilters need swapping more often. A whole house system carries a high upfront price but a low cost per gallon. Before you buy, find the cartridge replacement interval and price, multiply it out over a few years, and compare on that basis. Thinking in cost per gallon rather than cost per box is how you avoid an expensive habit disguised as a cheap purchase.
There is also a hidden cost in neglect. An expired carbon filter is not neutral; once it is past its rated life it can release accumulated contaminants back into your water. Whatever you buy, you have to actually replace the filters on schedule, so factor in a system whose maintenance you will realistically keep up with.
Matching the Filter to Your Situation
With the pieces in hand, the decision usually resolves quickly along a few lines.
If you rent, stay with anything that requires no plumbing: a certified pitcher, a faucet mount, or a countertop reverse osmosis unit. These move with you and need no landlord’s permission.
If you own your home and want filtered water at the kitchen tap, an under sink system, including under sink reverse osmosis, offers the best combination of capacity and out of sight convenience.
If you are on a private well, lean toward whole house treatment paired with point of use filtration, and prioritize microbial and nitrate protection alongside whatever your test revealed.
If your concern is a specific contaminant such as lead or PFAS, let the certification lead the decision. Choose the format you can live with, then pick the model within it that is certified for your contaminant.
Filter Types at a Glance
Here is how the formats compare on the factors that usually decide a purchase.
Common Mistakes to Avoid
A few errors come up again and again. The first is buying before testing, which means filtering blind. The second is treating “NSF certified” as a blanket guarantee rather than checking the specific contaminant claim. The third is judging a filter by its sticker price instead of its cost per gallon over time. The fourth is forgetting to replace cartridges, which turns a good filter into a liability. And the last is overbuying, paying for reverse osmosis to solve a chlorine taste problem that a simple carbon filter would have fixed for a fraction of the cost.
The Bottom Line
A good water filter purchase is a process of elimination, not a leap of faith. Test your water, identify the contaminants that actually matter for your home, learn which certifications prove removal of those specific contaminants, choose a format that fits your living situation and budget over time, and verify the maintenance is something you will keep up with. Do that, and the brand on the box becomes almost incidental. You will not have bought the most popular filter or the most expensive one. You will have bought the right one, and you will know exactly why.